Survey Logo
What Is the Survey Logo?
The survey logo is an image in the form's header, next to the survey title. Respondents see it at the top of the form while they fill it out.
A familiar logo tells respondents who is asking and that the form is genuine. That matters most when a form arrives by email or is embedded in another website, and when it asks for business or personal details: a supplier is far more likely to complete a registration form that clearly comes from the company they work with than an anonymous one.
In Endatix Hub, you add the logo in the Form Builder. Upload an image or paste a link to one, set its size in the survey's Logo in the Survey Header settings, and choose which side of the title it appears on in the Themes tab.
Where to Find the Logo Settings
| Setting | Where to find it |
|---|---|
| Survey logo | The image placeholder above the survey title on the design surface, or the Property Grid → Logo in the Survey Header |
| Logo width, Logo height, Logo fit | Designer tab → click an empty area of the design surface → Property Grid → Logo in the Survey Header |
| Logo alignment | Themes tab → Header |
Settings at a Glance
| Setting | Default | What it does |
|---|---|---|
| Survey logo | — | The logo image: an uploaded file or a link to an image. See Adding the Logo Image. |
| Logo width | auto | The width of the logo. auto calculates the width from the height, keeping the image's proportions. |
| Logo height | 40px | The height of the logo. |
| Logo fit | Contain | How the image fills the space set by Logo width and Logo height. See Logo Size and Fit. |
| Logo alignment | Left | Shows the logo to the left or to the right of the survey title. See Logo Alignment. |
Example: Adding a Company Logo to a Supplier Registration Form
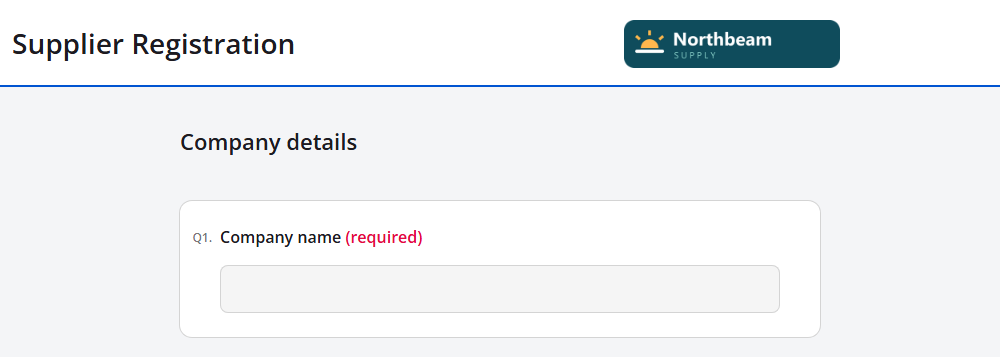
Northbeam Supply emails a Supplier Registration form to new vendors. To show suppliers at a glance who is asking for their company details, the form gets the Northbeam Supply logo, slightly larger than the default and on the right side of the header, opposite the title.
1. Upload the Logo
Open the form's Designer tab. Above the survey title, click the image placeholder and choose the logo file on your computer.


The logo appears on the design surface right away. You can upload PNG, JPEG, GIF, SVG, WebP, AVIF, and APNG images.
If your logo is published on your website, you can link to it instead of uploading a copy: open Logo in the Survey Header (see the next step) and paste the image's address, such as https://www.example.com/images/logo.png, into Survey logo. See Adding the Logo Image for the differences.
2. Make the Logo Larger
Click an empty area of the design surface, then click the Logo in the Survey Header icon in the category bar on the right of the Property Grid. Set Logo height to 48px.
Leave Logo width at auto, so the width follows the image's proportions, and Logo fit at Contain, so the whole logo stays visible.
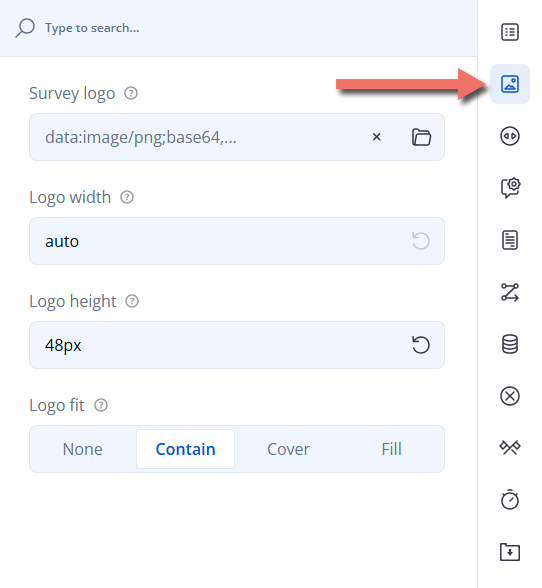
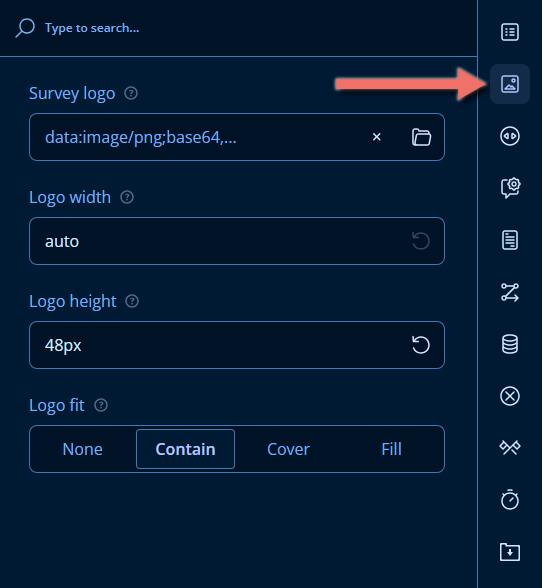
The design surface and the Preview tab keep the logo at its default height, whatever you enter in Logo width, Logo height, and Logo fit. Check the size in the published form, as shown in step 4.
3. Move the Logo to the Right
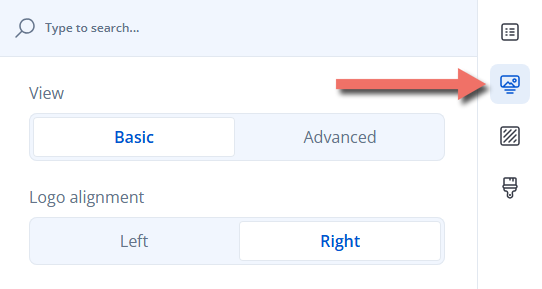
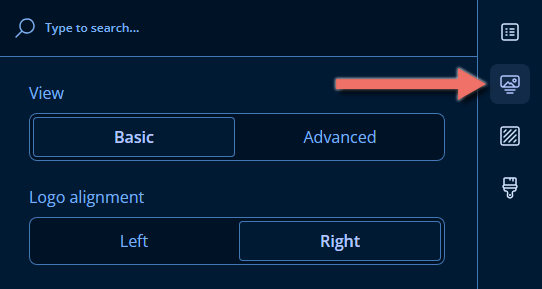
Open the Themes tab and click the Header icon in the category bar on the right. With View set to Basic, set Logo alignment to Right. The preview on the left shows the logo on the opposite side of the header from the title.
4. Save and Check the Published Form
Click Save. Because you changed a setting in the Themes tab, Hub asks Save theme changes?. Logo alignment is saved with the form whichever option you choose, so if you haven't changed anything else in the Themes tab, click Discard changes — the theme, which other forms may share, stays exactly as it was. See Logo Alignment.
To see the logo at its final size, go to the Forms list, hover over the form's card, and click Share Link. The published form opens in a new browser tab:
Replacing or Removing the Logo
Hover over the logo on the design surface. Two buttons appear:
- Select a file (folder icon) — choose another image to replace the logo.
- Remove the file (eraser icon) — remove the logo from the form.


You can also clear the Survey logo field in the Property Grid with its × button, or click the folder icon next to it to choose a new file.
Adding the Logo Image
There are two ways to add a logo, and they differ in where the image is kept.
Uploading a File
When you upload a file — from the placeholder on the design surface or with the folder icon in Survey logo — where the image ends up depends on how your Hub is set up:
- With file storage. If your organization has connected Hub to file storage, such as Azure Blob Storage or an S3-compatible service like RustFS, the image is uploaded there and the form keeps a link to it. If the storage is private, Hub gives the form temporary access to the image each time it's displayed, so respondents see the logo while the file itself stays private.
- Without file storage. The image is saved inside the form itself as text — Survey logo then starts with
data:image/. The logo works everywhere the form does, but it adds to the size of the form, which is loaded every time someone opens it. Keep the file small: the hint next to Survey logo recommends 64 KB or less.
To find out whether file storage is set up, ask your Hub administrator. Setting it up is described in Azure Blob Storage and RustFS storage.
Linking to an Image
Paste the address of an image into Survey logo. The form loads the logo from that address every time it's displayed, so:
- The image must be publicly reachable. Respondents' browsers load it directly — an image on an intranet or behind a sign-in won't show. Use an
https://address. - The logo depends on the other website. If the image is moved, renamed, or deleted there, the logo disappears from your form. Uploading a copy avoids that.
- The image isn't size-limited, because it isn't stored in the form.
Choosing a Good Logo Image
- Use a horizontal version of your logo. The header leaves little height — 40 pixels by default — so a wide logo with a short wordmark stays readable, while a tall, square emblem shrinks to an icon.
- Upload an image larger than it's displayed. An image two to three times the displayed height — for example, 120 to 144 pixels tall for a 48-pixel logo — stays sharp on high-resolution screens. SVG images stay sharp at any size.
- Check it against the header background. A logo with a transparent background takes on the header's color, so dark lettering can disappear on a dark theme. A logo with its own background, or one designed for the theme's colors, reads well everywhere.
Logo Size and Fit
Logo width and Logo height accept CSS sizes, such as 48px or 20%. By default, Logo height is 40px and Logo width is auto, which scales the image to that height without distorting it — the simplest setup is to change only Logo height.
When you set both a width and a height, they make a box of a fixed size. Logo fit decides how the image fills that box when the box doesn't have the same proportions as the image:
| Logo fit | Result |
|---|---|
| None | The image keeps its original size. If it's larger than the box, only the middle part of the image is shown. |
| Contain (default) | The whole image is scaled to fit inside the box, keeping its proportions. Empty space may remain at the sides or at the top and bottom. |
| Cover | The image is scaled to fill the whole box, keeping its proportions. The parts that don't fit are cut off. |
| Fill | The image is stretched to exactly the width and height of the box, which distorts it when the proportions differ. |
For most logos, keep Contain: it never crops or distorts the image.
Logo Alignment
Alignment is set in the Themes tab, under Header. The options depend on the header View.
Basic Header
The Basic view is a simple header that shows the logo in line with the survey title and description. Logo alignment places the logo to the Left (default) or to the Right of the title. The option is available once the form has a logo.
Logo alignment in the Basic view is saved with the form, not with the theme. When you save, Hub still asks Save theme changes?, because the setting is in the Themes tab: choose Discard changes to keep the theme as it is — the alignment is saved either way.
Advanced Header
The Advanced view turns the header into a banner with its own height, background color, and background image. The logo, the survey title, and the survey description can each be placed anywhere in it: Logo alignment has a horizontal choice — Left (default), Center, or Right — and a vertical choice — Top (default), Middle, or Bottom.
Unlike the Basic view's alignment, everything in the Advanced view is part of the theme. When you save, Save theme updates the theme for every form that uses it. To keep an advanced header for this form only, select Save as a new theme instead and give the theme a name. The built-in Default theme can't be overwritten, so its changes are always kept as a new theme.
Different Logos for Different Languages
A multilingual form can show a different logo for each language — for example, a logo with a translated slogan. Add the logo for each language in the JSON Editor, as shown in Example — A Logo per Language. Languages without a logo of their own show the default one.
The logo isn't listed in the Translations tab. See Form Translation for translating the rest of the form.
Important Considerations
- The logo appears even when the title is hidden. If Make the title and description visible is cleared in the survey's General category, the header shows only the logo. To hide the logo, remove it.
- The survey title describes the logo to screen readers. The logo's alternative text is the survey title — even when the title isn't visible — so give every form a meaningful title, such as "Supplier Registration", rather than leaving the default.
- Size and fit are visible only in the published form. The design surface and the Preview tab always show the logo 40 pixels tall. Use Share Link to check the result.
Related Documentation
- Question Settings — the form-wide defaults for numbering and laying out questions.
- Form Translation — translate your form into other languages.
- Azure Blob Storage and RustFS storage — set up the file storage that uploaded logos are saved to.
Technical Reference (JSON Schema)
The logo settings of the example form look like this in the JSON Editor. With file storage, logo holds the link to the uploaded file; without it, logo holds the image itself as a data:image/png;base64,... value.
{
  "title": "Supplier Registration",
  "logo": "https://www.example.com/images/northbeam-supply-logo.png",
  "logoHeight": "48px",
  "logoPosition": "right",
  "pages": [
    {
      "name": "company",
      "title": "Company details",
      "elements": [
        {
          "type": "text",
          "name": "company_name",
          "title": "Company name",
          "isRequired": true
        }
      ]
    }
  ]
}
Properties left at their default values, such as logoWidth and logoFit, are omitted from the JSON.
Survey Properties
| Property | Type | Default | Description |
|---|---|---|---|
logo | string (localizable) | — | Survey logo: an image URL or a data: URL with the embedded image. |
logoWidth | string (CSS size) | "auto" | Logo width. |
logoHeight | string (CSS size) | "40px" | Logo height. |
logoFit | "none" | "contain" | "cover" | "fill" | "contain" | Logo fit. |
logoPosition | "left" | "right" | "none" | "left" | Logo alignment in the Basic header. "none" hides the logo without removing the image from the form; it's available only in JSON. |
Theme Properties (Advanced Header)
The Advanced header is stored in the theme's JSON, not in the form's.
| Property | Type | Default | Description |
|---|---|---|---|
headerView | "basic" | "advanced" | "basic" | View. |
header.logoPositionX | "left" | "center" | "right" | "left" | Horizontal Logo alignment. |
header.logoPositionY | "top" | "middle" | "bottom" | "top" | Vertical Logo alignment. |
Example — A Logo per Language
{
  "title": {
    "default": "Supplier Registration",
    "de": "Lieferantenregistrierung"
  },
  "logo": {
    "default": "https://www.example.com/images/logo-en.png",
    "de": "https://www.example.com/images/logo-de.png"
  },
  "logoHeight": "48px"
}
Respondents who fill out the form in German see logo-de.png; respondents in any other language see logo-en.png.